ubuntu安装Anaconda 以及 dataspell配置jupyter |
您所在的位置:网站首页 › dataspell anaconda › ubuntu安装Anaconda 以及 dataspell配置jupyter |
ubuntu安装Anaconda 以及 dataspell配置jupyter
|
一、ubuntu 安装 Anaconda 及配置
第一步、下载 Anaconda
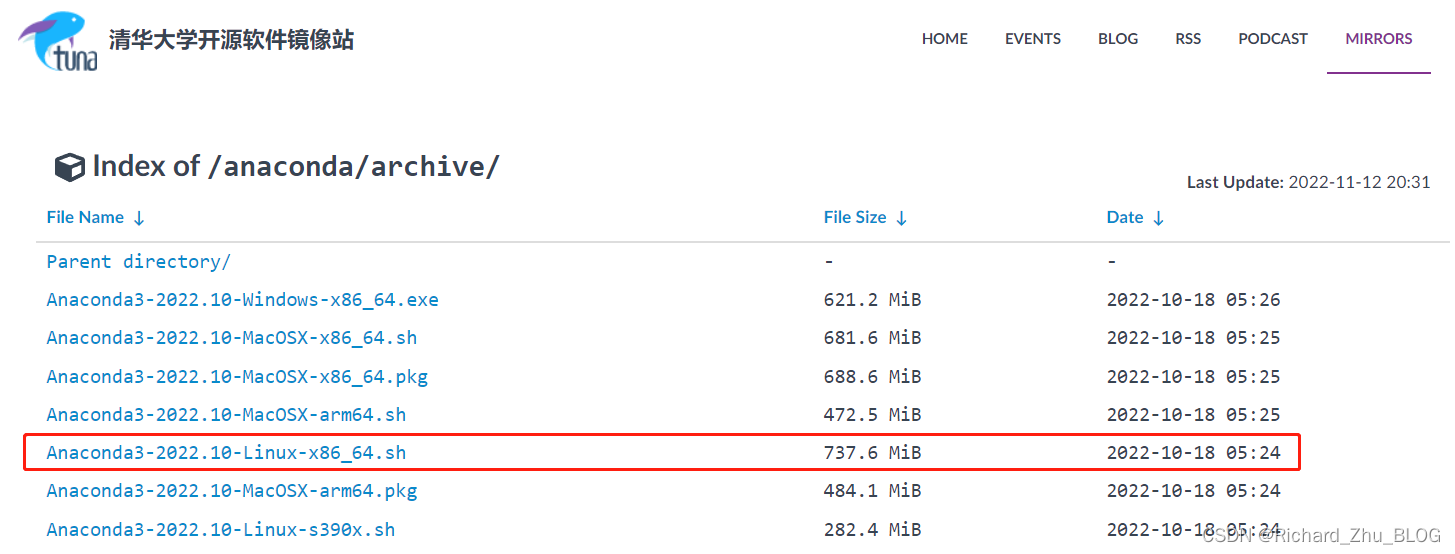
anaconda官方网址: https://repo.anaconda.com/archive/ https://www.anaconda.com/products/distribution#Downloads由于官方网站下载速度较慢,建议到 清华镜像官网 选择合适的安装包下载: 把下载好的anaconda上传到虚拟机/服务器上,笔者是传输到阿里云服务器 切换到Anaconda安装包所在位置 先按回车,然后再一直按回车阅读Cryptography Notice 直到出现: Do you accept the license terms? [yes | no] [no] >>> Please answer 'yes' or 'no' : ' >>> yes输入yes,并按回车键 回车选择默认的安装路径: Anaconda3 will now be installed into this location: /root/anaconda3 #默认的安装路径 - Press ENTER to confirm the location - Press CTRL-C to abort the installation - Or specify a different location below [/root/anaconda3] >>> PREFIX=/root/anaconda3等待安装,根据需要,输入yes或者no Do you wish the installer to initialize Anaconda3 in your /root/.bashrc ? [yes/no] [no] >>> You may wish to edit your /root/.bashrc to setup Anaconda3: source /home /hadoop/anaconda3/etc/profile.d/conda.sh Thank you for installing Anaconda3! Anaconda is partnered with Microsoft! Microsoft vscode is a streamlinedcode editor with support for development operations like debugging,taskrunning and version control.有些版本会提示是否安装vscode,一般选择no即可! 第四步:修改环境变量 vim ~/.bashrc如果是非root用户,在更改.bashrc时注意anaconda3的位置应该是’home/xxx/anaconda3/bin’ source一下: source ~/.bashrc检查是否安装成功: conda --version >>conda 22.9.0 第五步:更换源进行换源是因为官方的源速度特别慢,下载包的时候很容易因为网络问题报错 conda config --add channels http://mirrors.tuna.tsinghua.edu.cn/anaconda/pkgs/free/ conda config --set show_channel_urls yes 二、配置 jupyter 1、先检查 jupyter 的安装情况,没有的话先安装 conda install jupyter 2、执行命令生成 jupyter 的配置文件 jupyter notebook --generate-config --allow-root >> writing default config to: /root/.jupyter/jupyter_notebook_config.py 3、生成用于登录的密码得到加密字符,需要保存后面改配置要用到 jupyter notebook password输入密码并再次确认密码一致: enter password: verify password:也可以通过ipython指令来获取: # 启动ipython ipython # 键入如下命令 from notebook.auth import passwd # 生成秘钥 passwd() # 退出Python,先保存秘钥 exit 4、修改配置文件建议使用vi查找功能,查关键字改配置,这个应该是基本功 c.NotebookApp.ip='*' # 星号代表任意ip,这个跟mysql的权限设置相似 c.NotebookApp.allow_root =True # 允许root运行 c.NotebookApp.allow_remote_access = True # 允许远程登入 c.NotebookApp.open_browser = False # 建议,默认不自动打开浏览器 c.NotebookApp.password = 'argon2:$argon2id$v=19$xxxxxxxxxxxxxxxxxx' # 输入生成的密钥 c.NotebookApp.port =8888 # 端口号冲突可以设置为9999 5、运行jupyter notebook 方式一:输入命令jupyter notebook启动,此种方式与powershell启动方式类似如果有报错的话,检查一下上面改配置的时候是否有改错,这个问题相信大家会很容易遇到,笔者就遇到了,后面排查好久才知道是配置改错的原因 ps:脑阔疼 然后浏览器输入http://ip:8888/即可访问,访问密码输入你生成秘钥的时候设置的密码,然后就可以通过浏览器访问了 这种方式是:jupyter notebook随终端关闭而关闭 方式三:后台运行jupyter,需要通过kill掉pid来关闭jupyter nohup jupyter notebook --allow-root > jupyter.log 2>&1 & ps -a kill -9 PID 三、dataspell连接jupyter服务器 第一步:打开dataspell – 点击 file – 点击 Add Jupyter Connection…
格式为: http://ip:8888
|
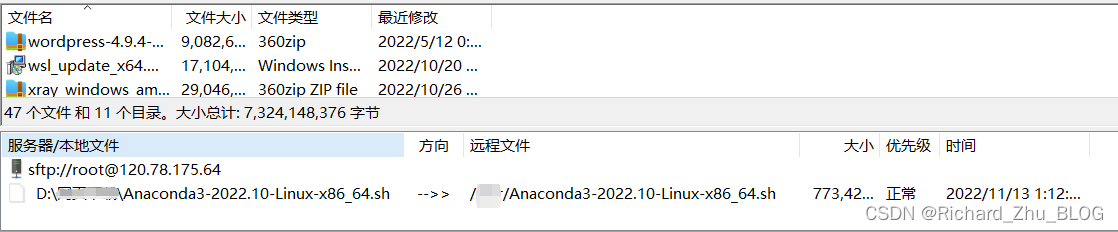
 执行命令:bash Anaconda3-2022.10-Linux-x86_64.sh 看到提示:
 通过两次Ctrl + C可以结束运行jupyter notebook服务
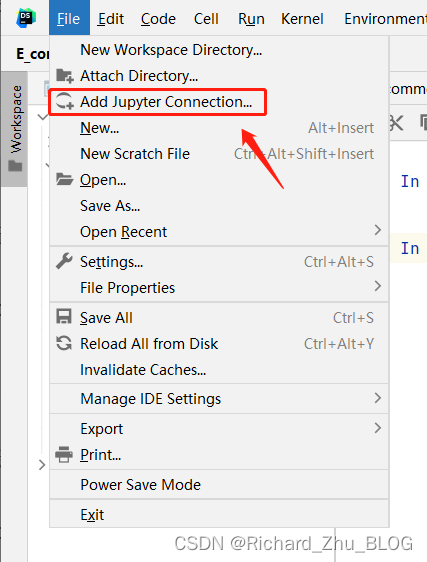
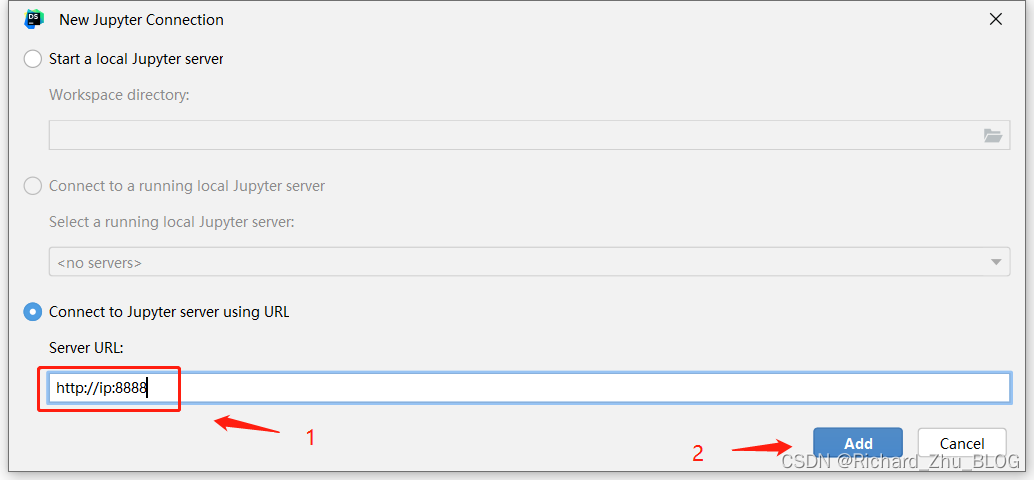 点击add添加之后,就可以愉快的玩耍了~
【本文地址】